
(photo credit: Kerby Ross)
Mounting a Rattlesnake
(photo credit: Kerby Ross)
Just like any taxidermy project, the first step is to acquire
reference pictures. 90% of mounting a rattlesnake is easy, it is the other 10%
makes it look real.
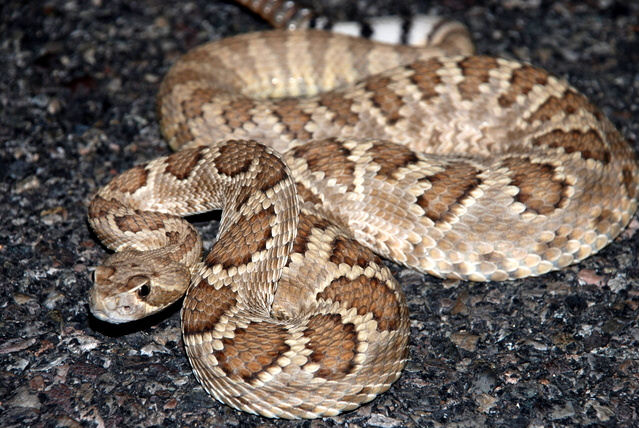
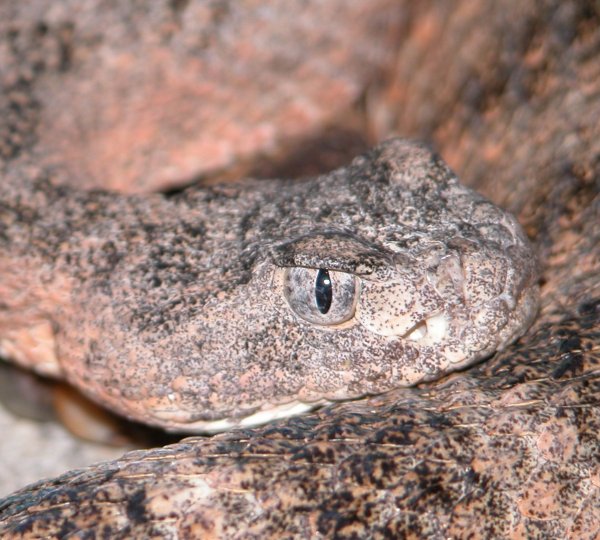
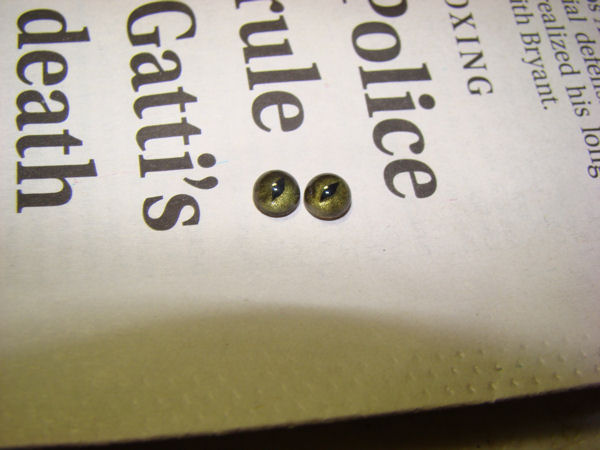
So first the pictures. For starters rattlesnakes DO NOT ALWAYS have
vertical/slit pupils (they can though). Just like other animal eyes, they
react to light and the lack of light.
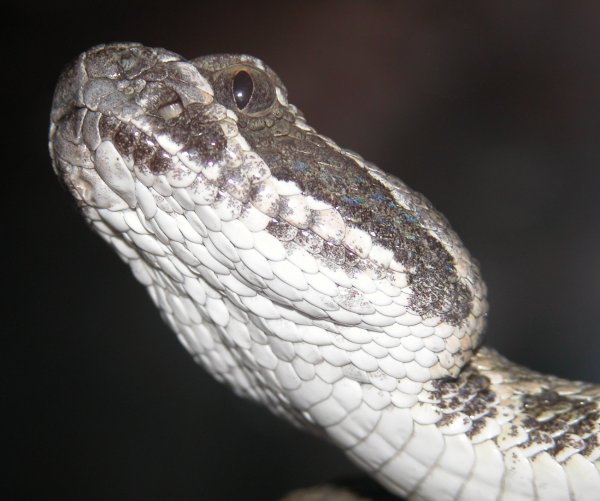
At night rattlesnake eyes are ROUND or ELIPTICAL because it is dark and the
pupil has to expand to allow more light. During the day when it is bright
out, the pupil
contracts and becomes VERTICAL/SLIT to reduce the amount of light.
Rattlesnakes do not have eye lids and cannot shut their eyes. They have a
scale that covers their eyes, the brille scale.
 Vertical or slit pupil Western Diamondback rattlesnake (photo credit: Kerby Ross) |
 Eliptical pupil Mojave rattlesnake (photo credit: Kerby Ross) |
 Round pupil Mojave rattlesnake (photo credit: Daniel Scalf) |
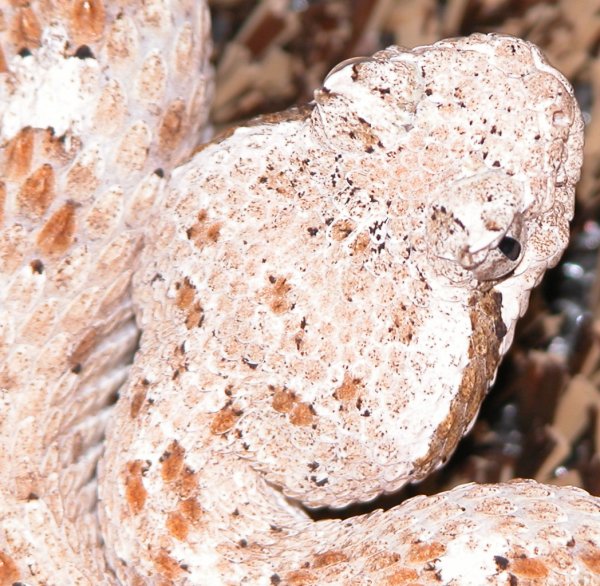
All rattlesnakes have supraocular scales (eyebrow scale).
They differ in size and shape between species.
The obvious exaggerated supraocular scale
can be found on the sidewinder rattlesnake and the blacktail rattlesnake has a
very small supraocular scale.
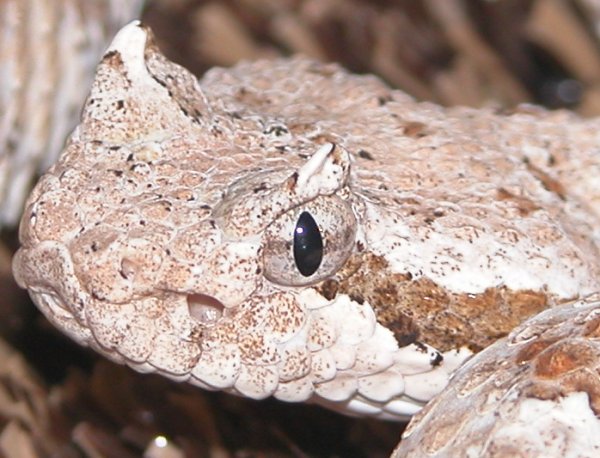 Sidewinder - supraocular scale (photo credit: Kerby Ross) |
 Blacktail rattlesnake - supraocular scale (photo credit: Kerby Ross) |
 Western Diamondback rattlesnake - supraocular scale (photo credit: Kerby Ross) |
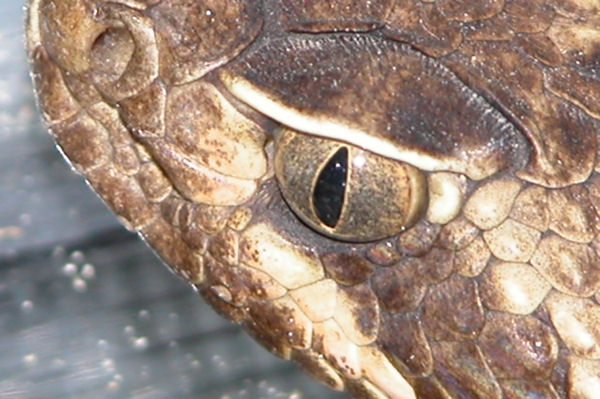
Another overlooked area in rattlesnake taxidermy is the eye
color. Most rattlesnakes have a colored stripe (ocular stripe) pattern
that goes right through the eye area.
Not all rattlesnake species have this ocular stripe, but for the majority that
do, their eye color is the same general color as the ocular stripe. This
is ignored
way too much in rattlesnake taxidermy.
 Grand Canyon rattlesnake (photo credit: Kerby Ross) |
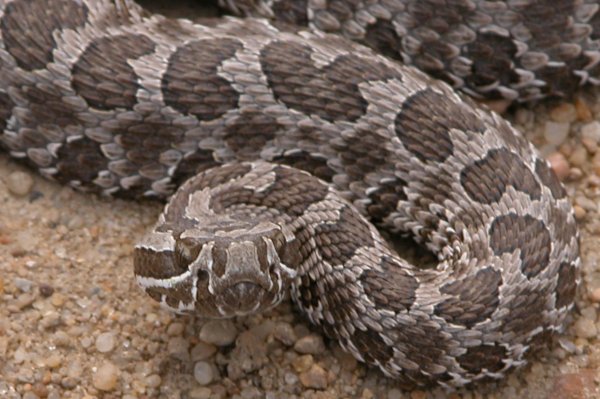 Massasauga rattlesnake (photo credit: Kerby Ross) |
 Western Diamondback rattlesnake (photo credit: Kerby Ross) |
 Red Diamond rattlesnake (photo credit: Kerby Ross) |
 Hopi rattlesnake (photo credit: Kerby Ross) |
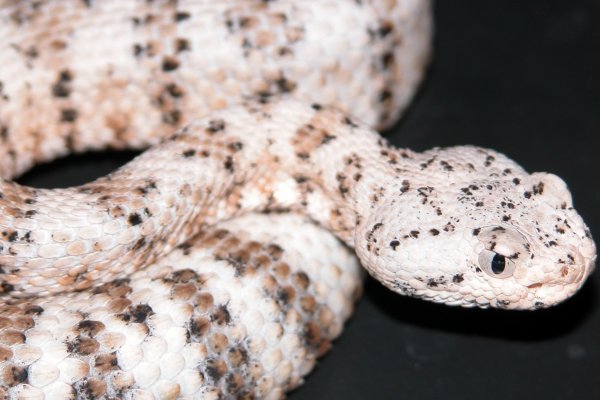 Speckled rattlesnake (photo credit: Kerby Ross) |
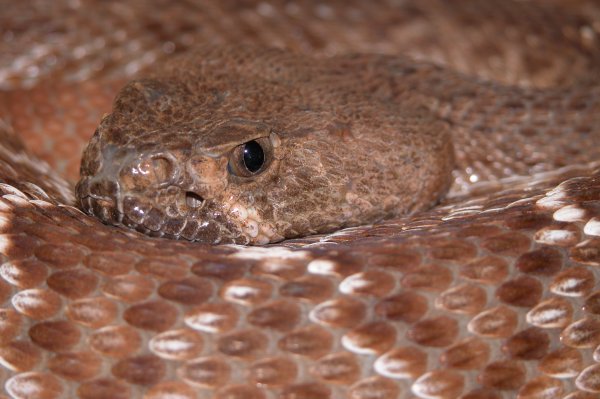
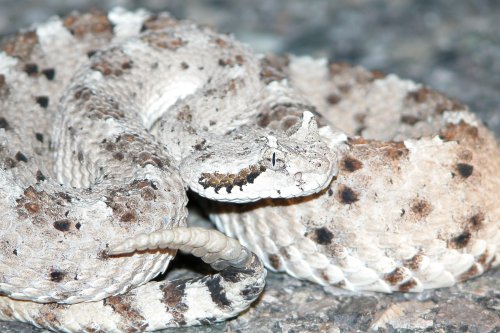
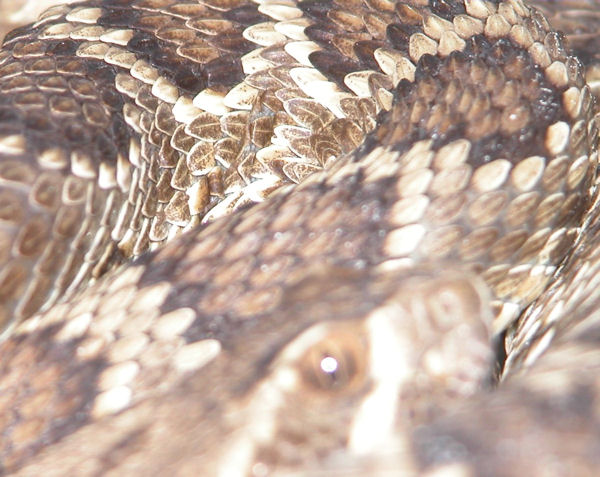
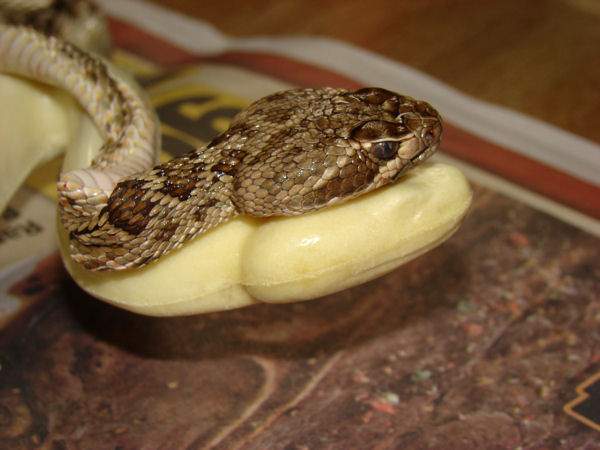
Another issue is the eye placement. The top of the pupil
can touch the lower part of the supraocular scale...BUT rarely touches the
bottom of the eye socket.
Although both eyes can move independently, it is rarely done. When a snake
is asleep the eyes roll forward and down. Both the front and rear part of
the
eye can show white, rarely at the same time though. Also the eyes are not
sunk in and in fact stick out some. The sidewinder even has a horizontal
"stripe in it's eye,
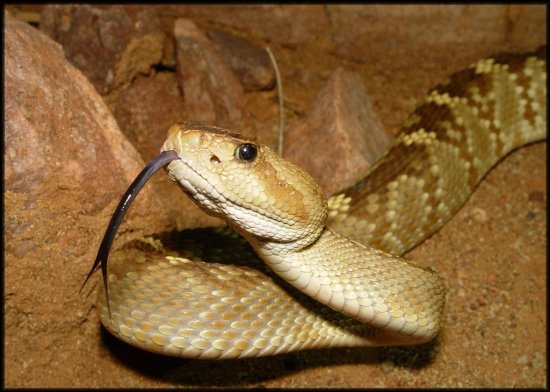
sometimes giving it an "+" look. When a rattlesnake lifts it's head
generally the pupil stays perpendicular to the GROUND! Of course there is
a limit.
 Sidewinder (photo credit: Kerby Ross) |
 Mojave rattlesnake (photo credit: Kerby Ross) |
 Mojave rattlesnake (photo credit: Kerby Ross) |
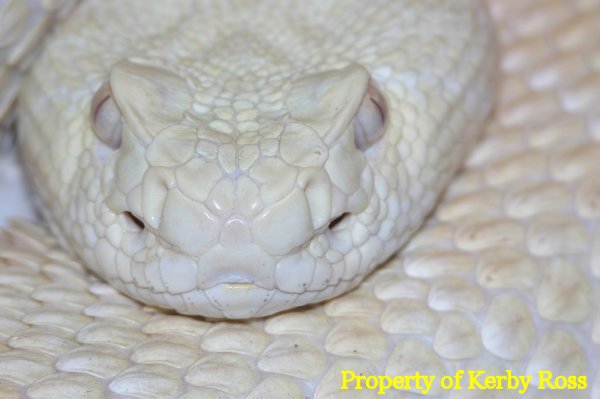 Albino Western Diamondback rattlesnake (photo credit: Kerby Ross) |
||
A few other points. The pits point
forward towards their target and the nostrils point out to the sides.
Usually when the snake is elevated the belly IS NOT FLAT but rather
has a round shape to it. The bottom of the tail is FLAT, rattlesnakes do
not have round shaped tails. Pits are SHALLOW! Rattlesnakes have a
specific
lip line, carve one into the form. The lower lip goes down first with the
upper lip slightly overlapping the lower lip. Rattlesnakes rarely lift
their tails
so high that the anal plate is exposed. Rattlesnakes are not "guard dogs"
and do not sit in a coiled position with their mouth open!
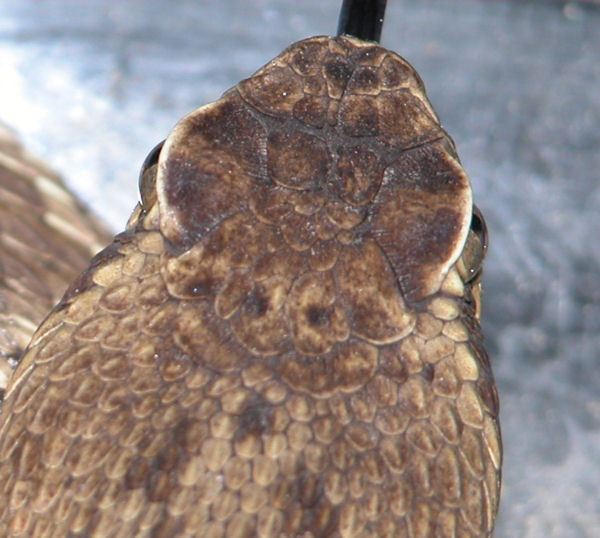
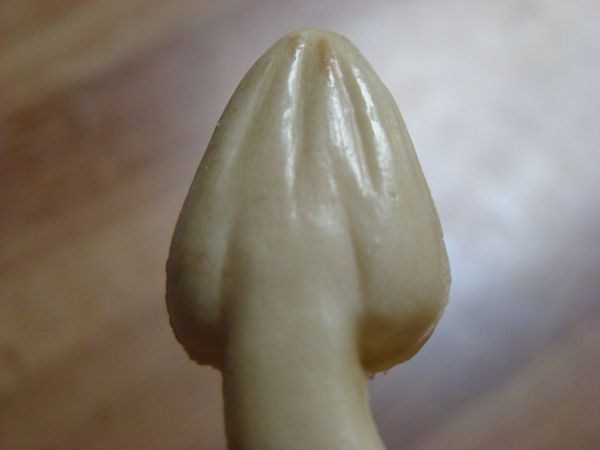
So what do we do with the "extra skin"
around the neck and just behind the head? It gets tucked right behind the
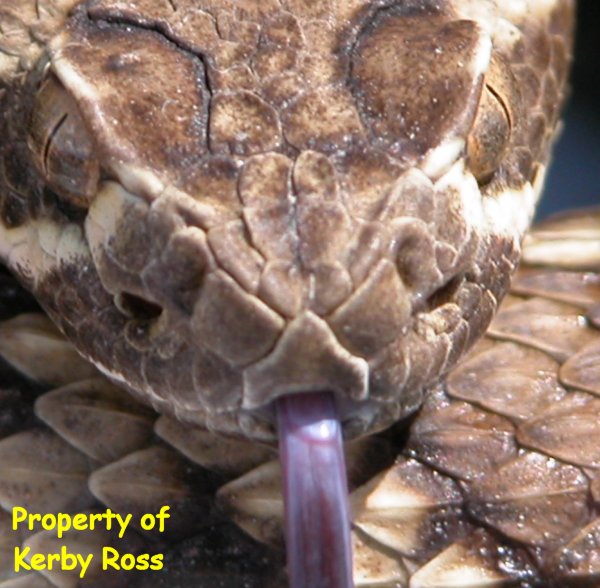
head! The rostral scale (nose scale)
is usually indented. And there are specific muscle detail under the chin.
There is a specific indent down the middle of the chin. The
anterior chin scutes are on each side. Basically there should not be any
wrinkles in the skin like you would see on boas and constrictors except on the
inside
curve where the scales do overlap and behind the head where they tuck "extra
skin".
 Speckled rattlesnake (photo credit: Kerby Ross) |
Western Diamondback rattlesnake (photo credit: Kerby Ross) |
 Desert Massasauga rattlesnake (photo credit: Kerby Ross) |
 Mojave rattlesnake (photo credit: Kerby Ross) |
 Mojave rattlesnake (photo credit: Kerby Ross) |
 Mojave rattlesnake (photo credit: Kerby Ross) |
 Mojave rattlesnake (photo credit: Kerby Ross) |
 Mojave rattlesnake (photo credit: Kerby Ross) |
 Speckled rattlesnake (photo credit: Kerby Ross) |
 Speckled rattlesnake (photo credit: Kerby Ross) |
 Blacktail rattlesnake (photo credit: Brendan O'Connor) |
 Mojave rattlesnake (photo credit: Kerby Ross) |
 Sidewinder (photo credit: Kerby Ross) |
 Sidwinder (photo credit: Kerby Ross) |
 Arizona Black rattlesnake (photo credit: Kerby Ross) |
 Arizona Black rattlesnake (photo credit: Kerby Ross) |
 Tiger rattlesnake (photo credit: Kerby Ross) |
 Mojave rattlesnake )photo credit: Kerby Ross) |
 Mojave rattlesnake (photo credit: Kerby Ross) |
 Mojave rattlesnake (photo credit: Kerby Ross) |
 Mojave rattlesnake (photo credit: Kerby Ross) |
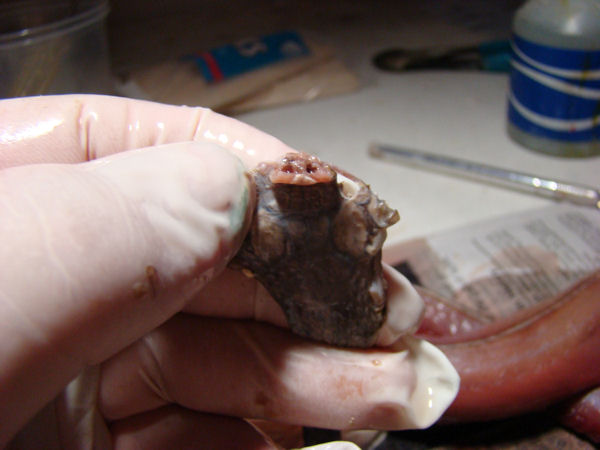
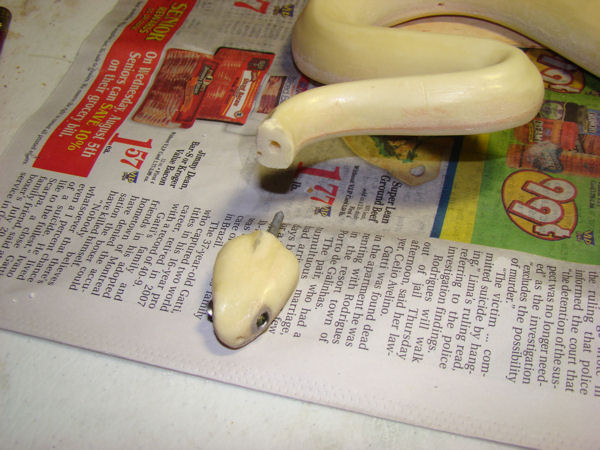
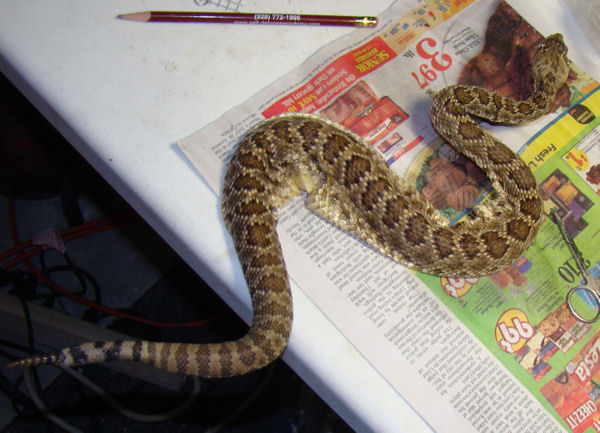
The basic measurements for snakes are length x girth.
Most taxidermy supply companies sell rattlesnake manikins. The main
problem with this is the size
of the head. They rarely fit perfect. This particular one was
slightly too large, so a little sanding was in order. Also most snake
forms will need to have
the flashing sanded. This particular form is a Gene Dobbs form. I
like his forms, it even has the chin detail. You will notice that I am
using two Mojave
rattlesnakes during this tutorial as I already skinned the one I was going to
use before I decided to take pics.
 |
 |
 |
 |
 |
|
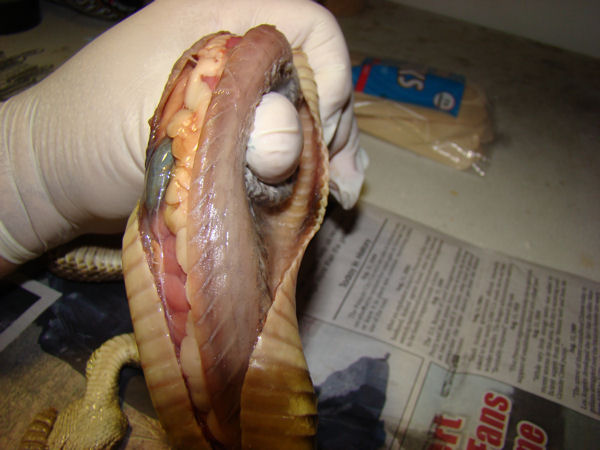
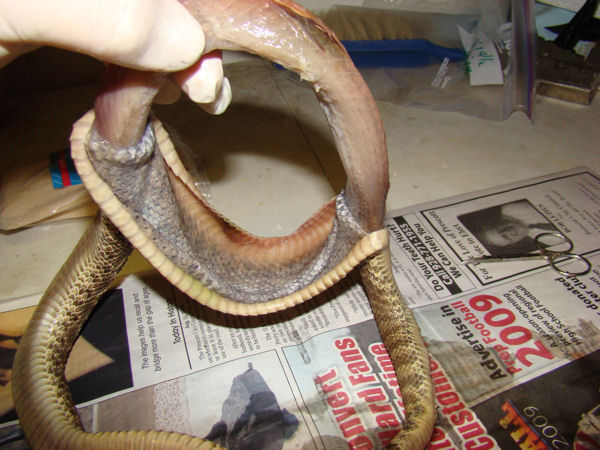
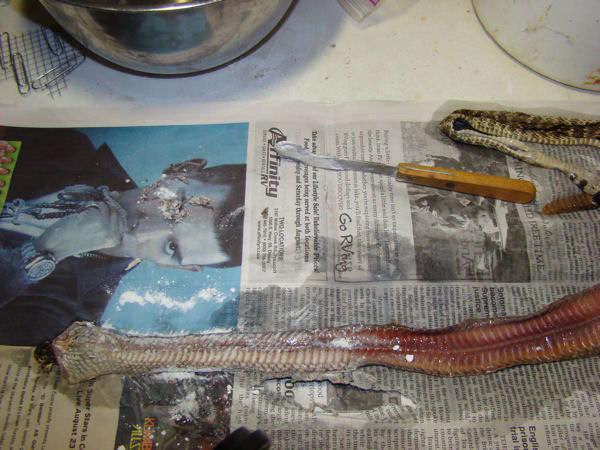
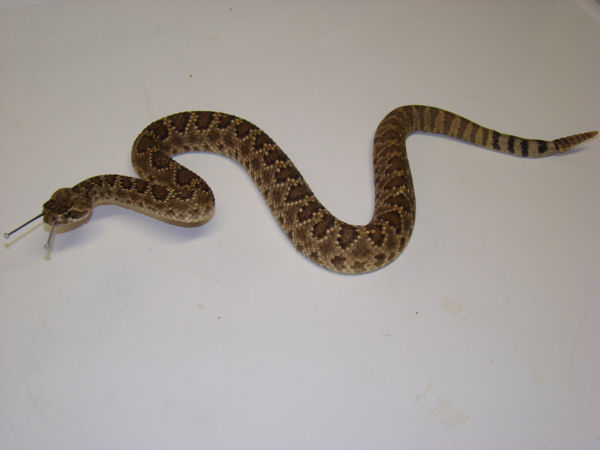
| The next step is to make
the incision down the belly. On crawling mounts you can make the
incision almost the whole length of the belly. On a coiled rattlesnake just make the incision where the belly will be touching the ground, then tube it from there. I use small cubicle scissors to cut the belly. From there I use my fingers to pry apart the skin from the carcass. It is a simple as pulling the skin away from the body down to the tail. It is necessary to use a scalpel to cut away the connecting tissue from the anal plate, then back to pulling the tail inside out. Then pull the body and neck inside out, stopping just before the jaw line. If you skin the mouth first from the outside then you can actually just pull the skin all the way off the head without using a scalpel or scissors. |
||
 |
 |
 |
 |
 |
 |
 |
 |
 |
 |
 |
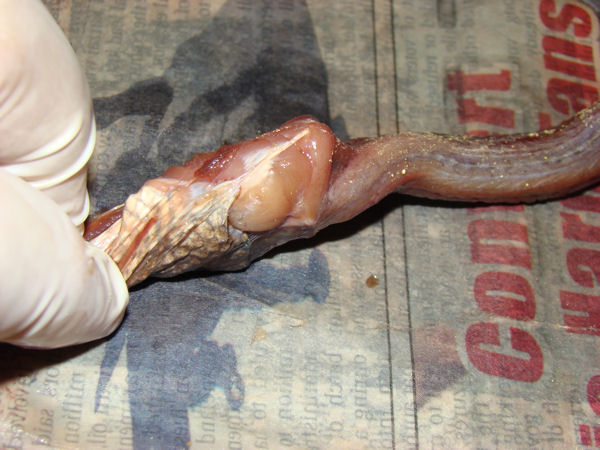 |
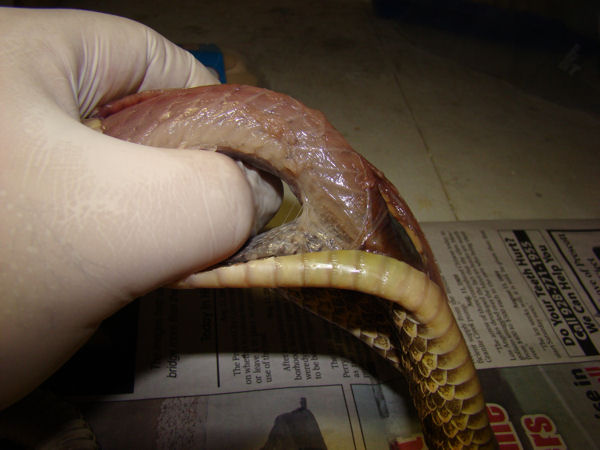
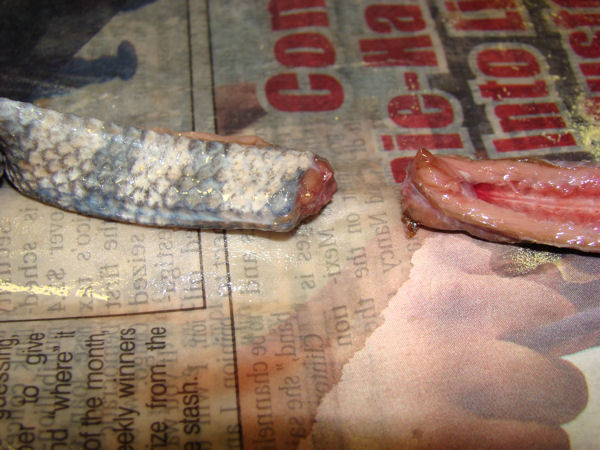
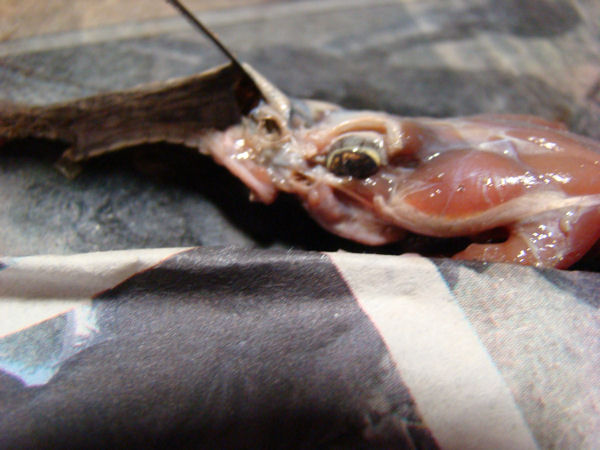
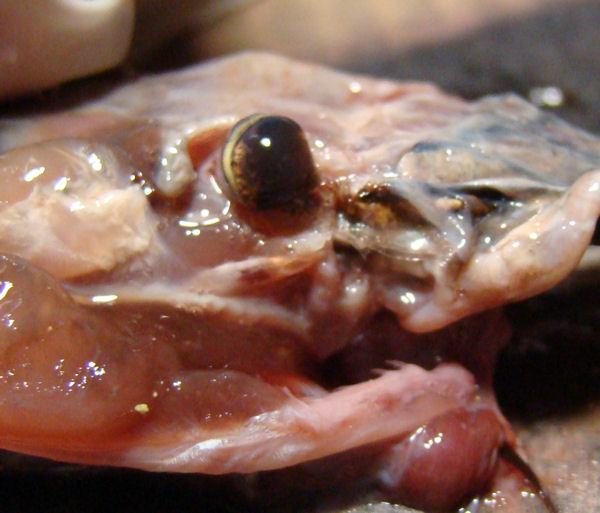
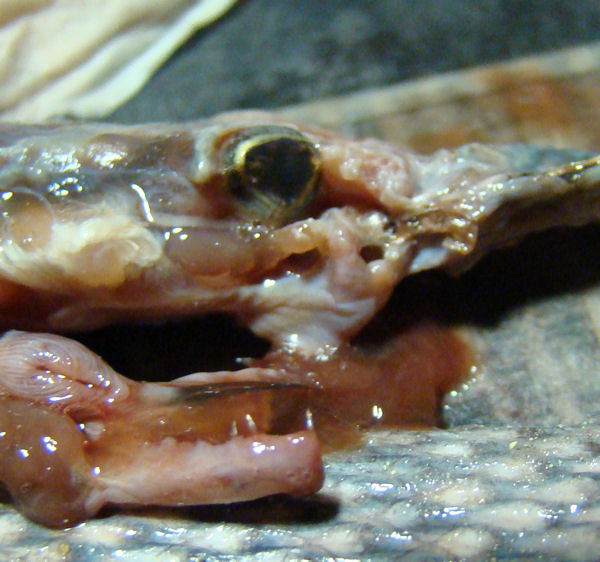
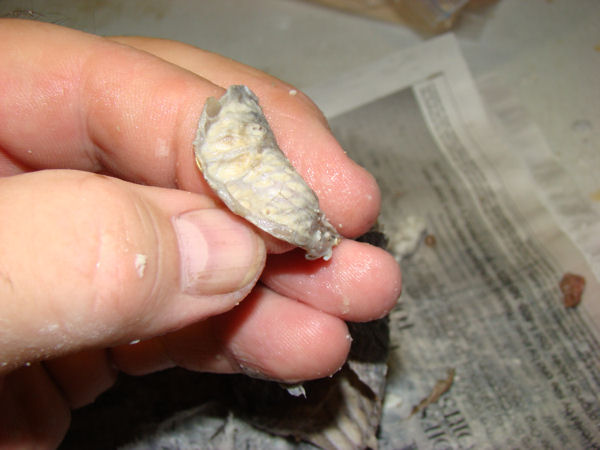
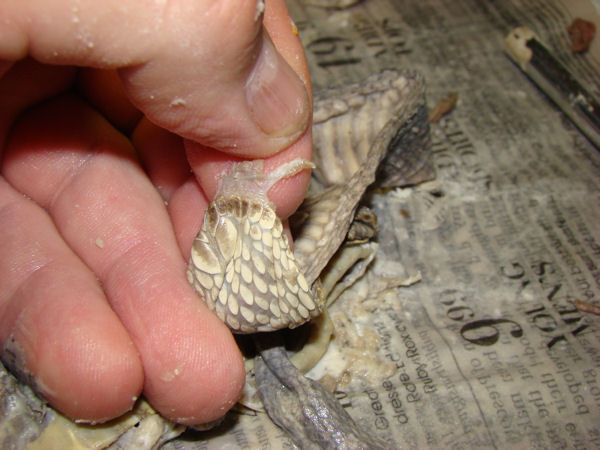
| If you have ever skinned an
animal out before then snakes should be no problem....just smaller.
Oh, and rattlesnakes don't have ear openings and they have pits. Just skin down past the eye just like an animal, then comes the pits, then the nose. During that time you will encounter the lips. Same as an animal. |
||
 |
 |
 |
 |
 |
 |
 |
 |
|
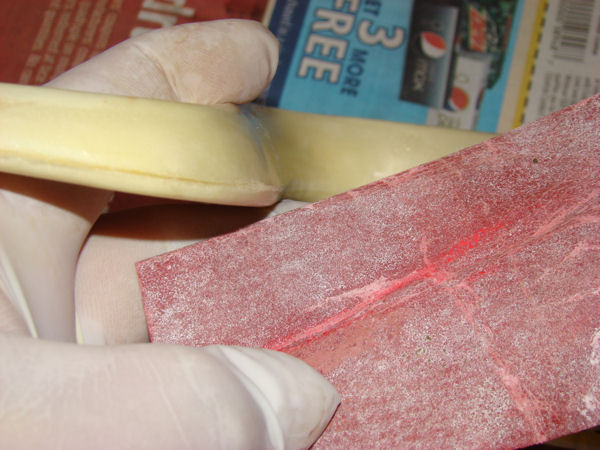
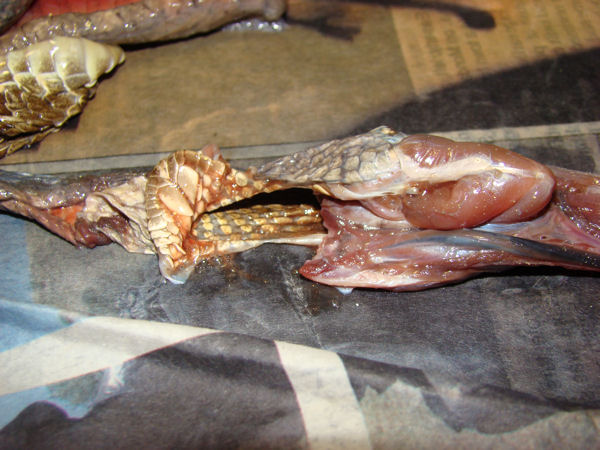
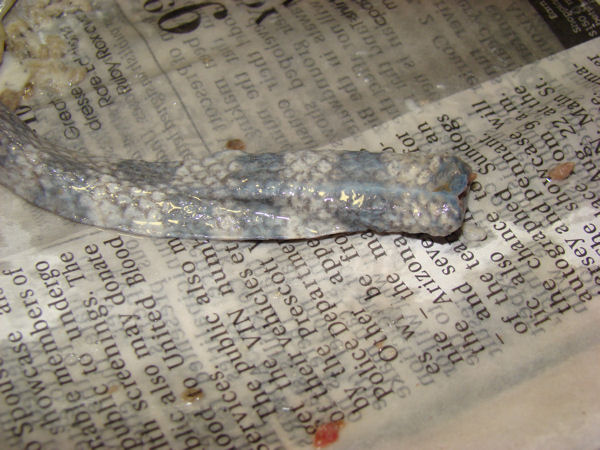
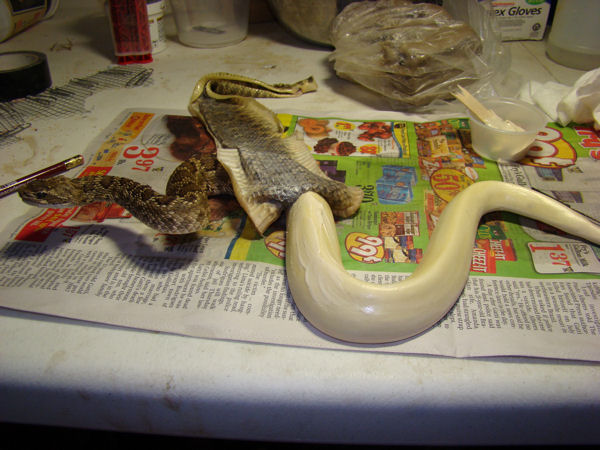
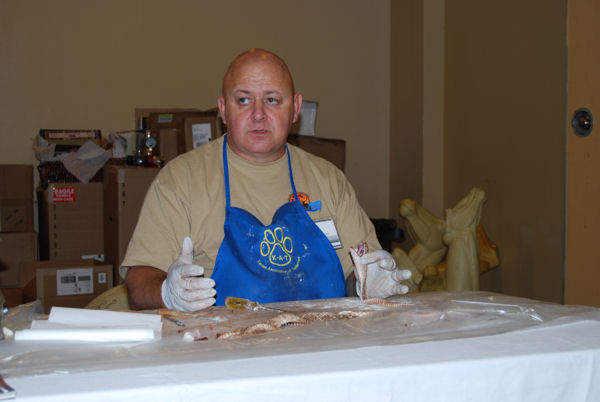
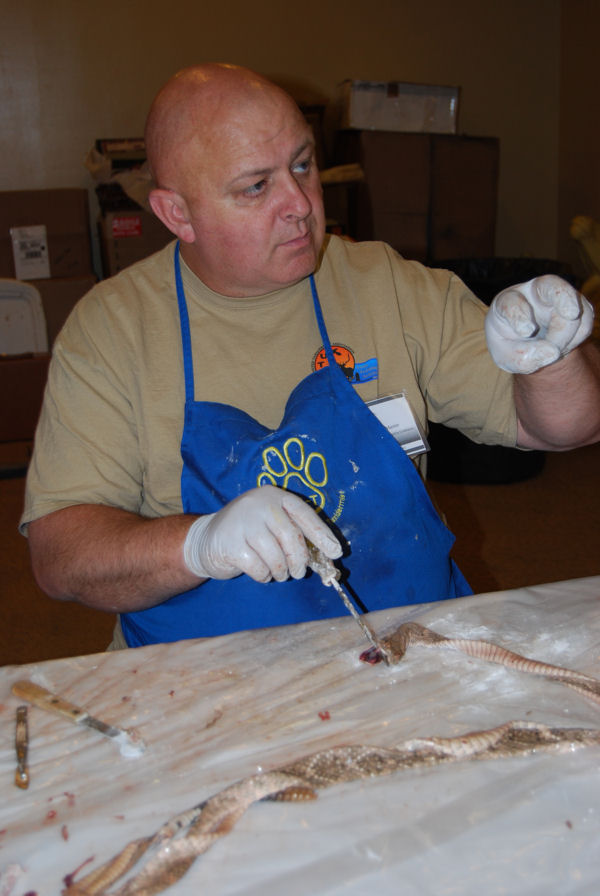
| Next we need to flesh the
skin and trim the lip line. I use dry preservative ONLY to help my
fleshing tool grab the meat. It will be washed afterwards to ensure that no dry preservative is left over. I use a fish skinning serrated knife to do my fleshing. Flesh from head to tail and from inside to outside. I use a scalpel to scrape the meat from the tail skin. Then back to the head. I use a scalpel to split the lip line and to skin out the nose. I also use small scissors to trim the fat off the lip line. |
||
 |
 |
 |
 |
 |
 |
 |
||
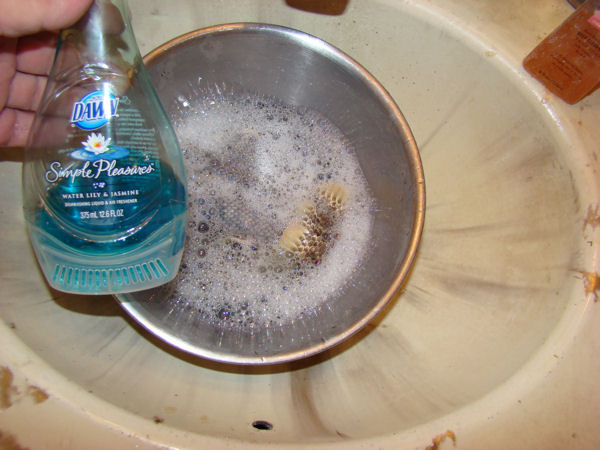
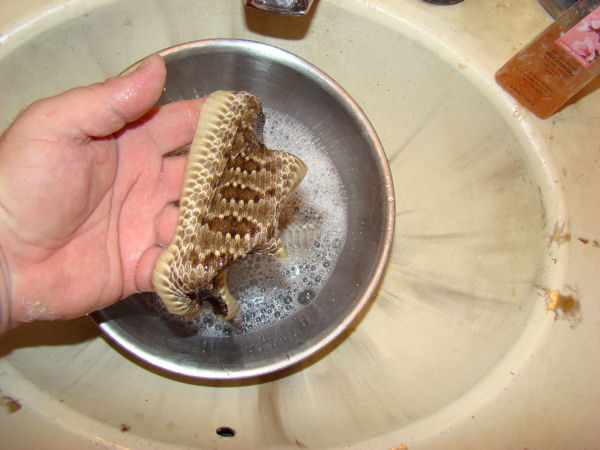
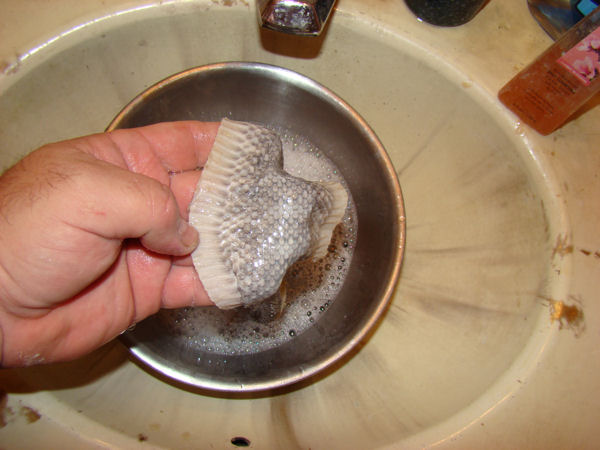
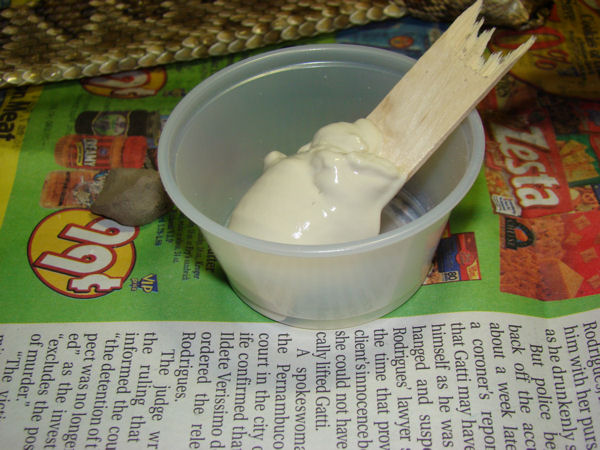
| I am not a fan of most tanning kits out there so this is what I do. I wash and soak the skin in Dawn degreaser dish soap for about 15 minutes. Rinse well. | ||
 |
 |
 |
 |
||
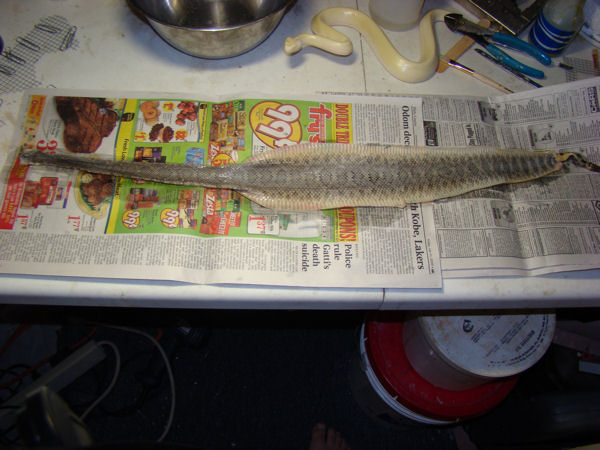
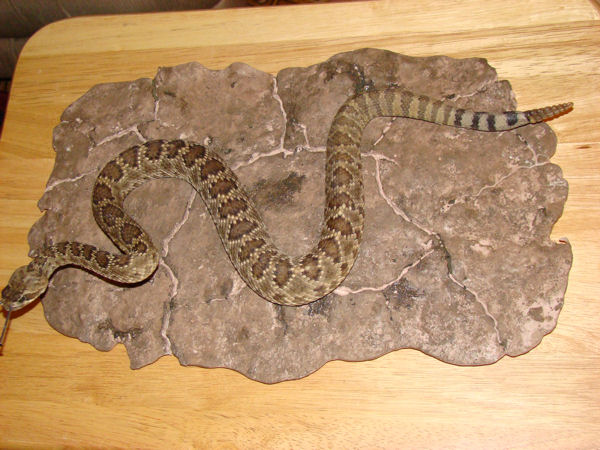
| Once the hide is washed you
can then proceed to use whatever tan/treatment you wish. Once
tanned/treated you can then proceed to mount it. I like to drill out the
eye sockets and vents and lip line while the mannikin head is still attached. I use critter clay for the eye sockets. Once the eyes are set (can still be repositioned later) I then cut of the mannikin head as it is too large to slide over the neck area. It is imperative that you use some sort of hide paste on reptile skin mounts. I like Dynamite 111. Once I slide the skin over the head part I can then glue the head back on. I use 2-part epoxy with a wire. You can also use a little bit of critter clay in this area to ensure a smooth joint. I get the head set first, but without gluing the lip line yet. I then start to staple the skin on the belly after applying a little bit of hide paste. It is best to start at the head, then go to the tail and work towards the middle. I would recommend test fitting so that you know it will fit before stapling. Once it is stapled on the belly I then go back and set the eyes and glue the lip line and position the vents. I like to use 2 part epoxy on the lip line as it allows more time to position the skin than with super glue or gorilla glue. As with any mount I will come back and check on it for scale alignment and air bubbles. |
||
 |
 |
 |
 |
 |
 |
 |
 |
 |
 |
 |
 |
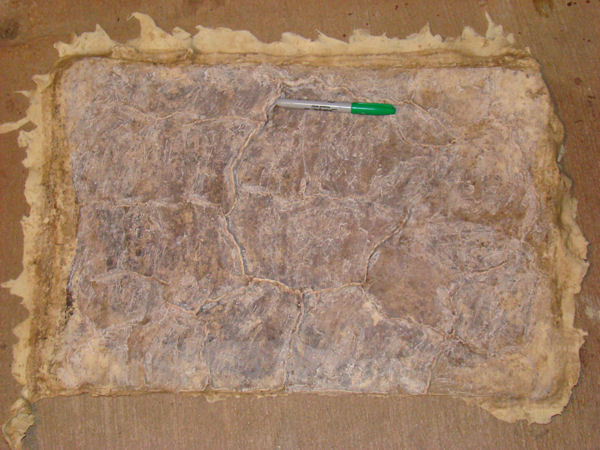
| I decided to make a dry
lake bed scene (harsh environment). I made this mold a couple of
years ago. I took a cement tub and filled it with some dirt. I then added enough water to cover it and let it set in the Arizona sun for a few days. Obviously the longer you let it set, the more cracks you will get. I then put a few coats of latex 74 directly onto the dry dirt, letting dry between coats. Then I mix bondo and fiberglass resin and pour into the mold, then paint. |
||
 |
 |
 |
 |
 |
 |
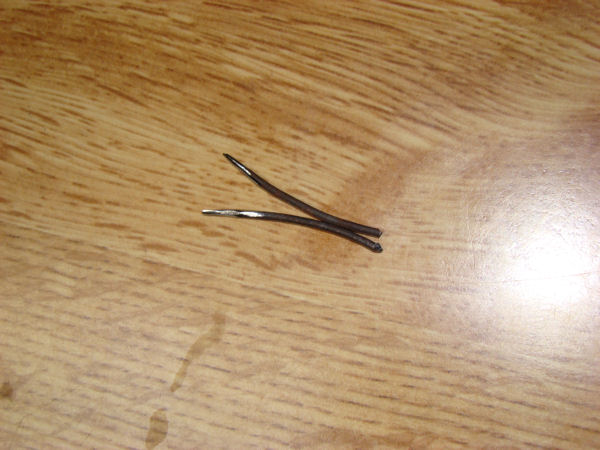
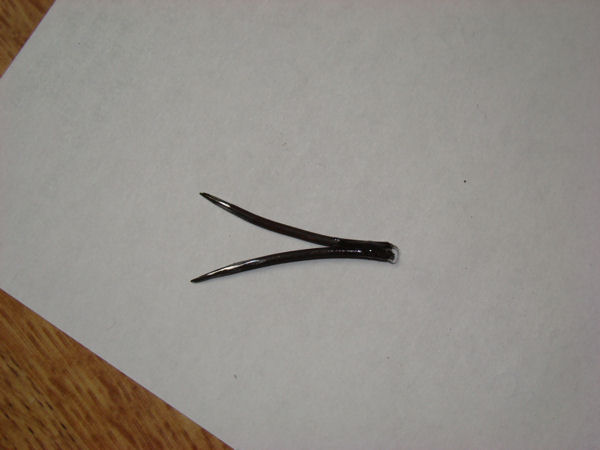
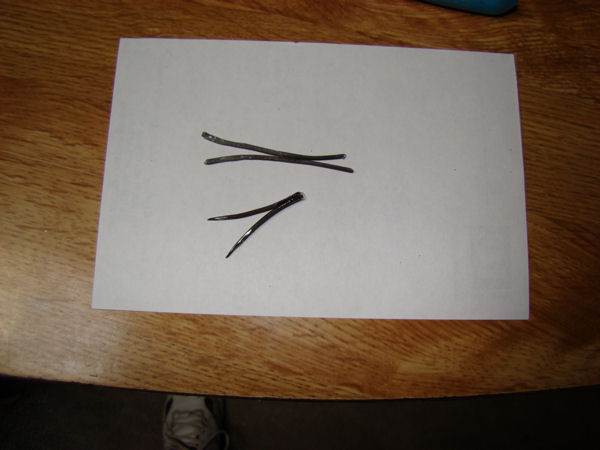
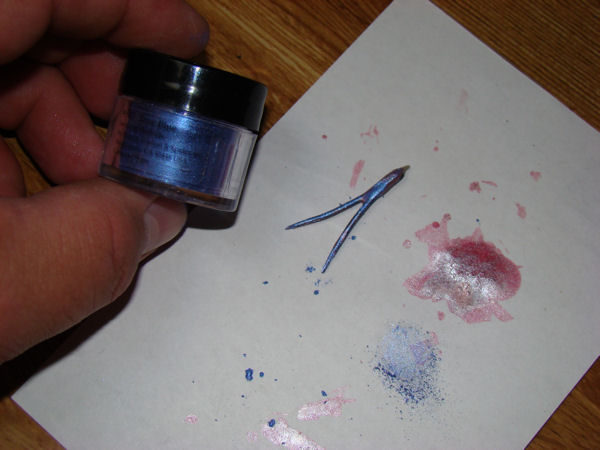
| There are numerous ways to make a tongue for a rattlesnake. I like using metal because it is durable.....we all know that everyone wants to touch it and ask if it is real, thus breaking it. The metal tongue will hold up. I take 2 pieces of small wire (fence post wire) and hammer them flat (optional), bend them to the desired position. Mix a small amount of 2 part epoxy glue and glue the ends together. Once dried I then mix 2 part apoxy sculpt and add it to the base of the tongue. Once dried I then add color. This is quite variable to each snake. First color on is liquid scales # LS 107 Pink Pearl. Once dried I then add Pearl Ex powder pigment # 687 True Blue. Since this is a powder you will have to seal or lock in the powder or it will rub off. Any sealer will work. Once dried I then air brush some black umber thinning as it goes to the points. Then I seal it with a gloss. | ||
 |
 |
 |
 |
 |
 |
 |
 |
 |
 |
 |
 |
 |
||
[ ABOUT ME ]
[ GALLERY ]
[ ART
WORK ]
[ REPTILE REFERENCE ]
[ FISH REFERENCE ]
[ HOME ]